Matt & I started a side project recently for some dear friends. We were asked to help build an ottoman for their living room. They have twin baby girls and need a softer place to play, store books & toys, and put your feet up on! Here is one of the inspiration photos for the type of ottoman they wanted:
Matt and I are no new-comers to
DIY projects, as you know, so this was a breeze! I was also excited to get my hands back into some simple upholstery work by sewing and tufting this bad boy! I learned some tricks when I built
my chair for my woodshop class in school (while at
K-State studying
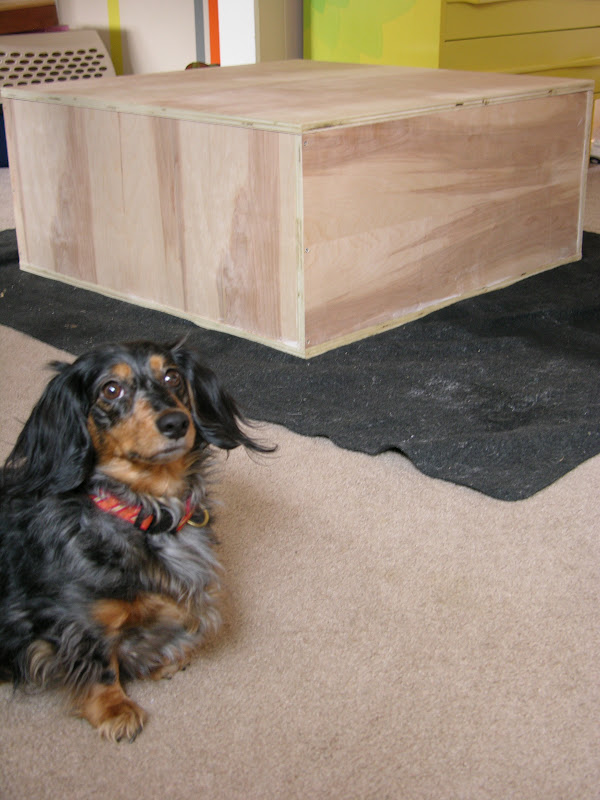
Interior Architecture & Product Design). Jager likes to pose on or in front of all my handmade furniture- what a good dog!
First, we bought one 4'x8' sheet of cabinet-grade 3/4" thick Birch plywood at Home Depot. To knock a few steps off the list, we always have them cut it a couple of times at the store so there are three smaller pieces that fit easier in the car! I bring my drawing/dimensions with me so I don't screw up the cut! The top drawing are the Home Depot cuts, the bottom are our own cuts at home from those pieces:
I wanted the overall dimensions of the ottoman to be close to 3'x3' so I had the wood cut at 2'10" (to leave some room for batting/fabric around the sides) This is the sketch I did before we started of the overall idea:
We then cut the wood into the shapes we needed using our circular saw:
two 2'10"x2'10" squares for the top and bottom
four 2' 9 1/4"x 13" rectangles for the sides
We used wood glue and Spax screws to assemble all of the pieces. [The glue is actually the strength that holds it all together; the screws keep it together to dry] These particular screws are self-tapping (you don't need to drill a pilot hole) and they keep plywood from splitting! - Thank you James Kersten for the tip!
Jager coming to check out what I'm doing:
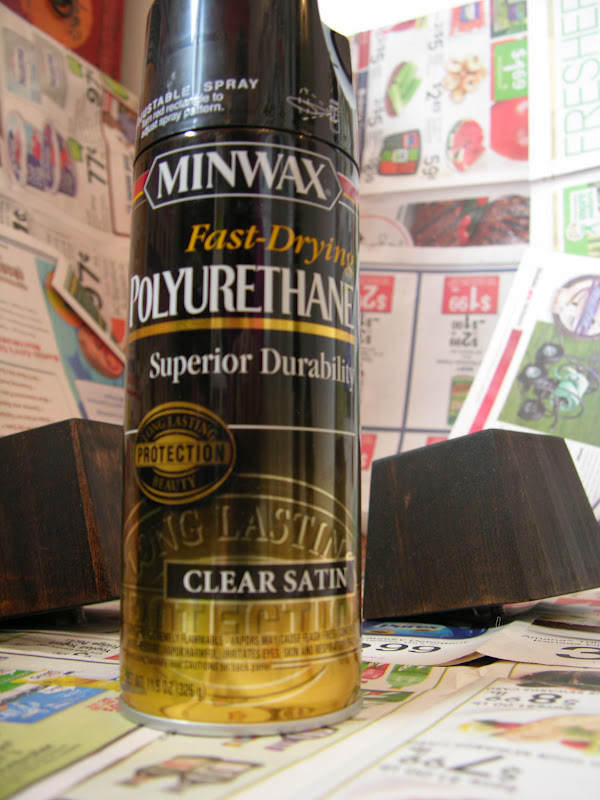
I bought four simple wood furniture feet from Home Depot and sanded them with steel wool. I stained them using a rag and a dark walnut oil-based stain [a rag so I don't have to clean a brush with mineral spirits]. Then I sprayed them with polyurethane to protect and seal them. [I used scotch tape around the metal threads to keep them from getting clear gunk on them]
Flip the feet over and get more coats on the bottom and other sides, allowing time to dry between each coat.
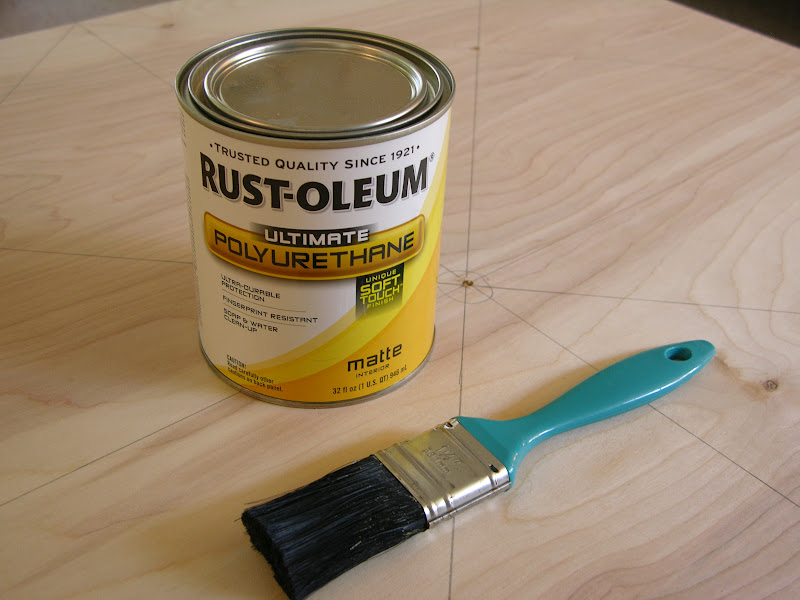
I brushed on polyurethane inside the box (where books, toys, blankets will be to protect the wood) and on the underside of the lid to keep anything from staining the plywood, etc.
Before adding the foam and batting, I drilled holes into the wood top where I wanted buttons tufted. I wanted 5 so I put one in the center of the wood, and the four others in the center of each quadrant by using a tape measure and level as a straight edge to draw the lines.
I used King size extra loft batting and high-density foam cushions. We used 2" thick foam with a 1" thick foam on top because there was no 3" at the store that day!
[side note: the top doesn't have to be that thick, but I wanted it to actually be cushy when you sat on it or put your feet up for a long period of time.]
The foam squares together form a 3' by 3' top and overhang the edges of the box a little bit. I planned this because I knew wrapping the batting around it tight would pull it in a little bit, I also wanted to foam to stick out farther than the wood top it was on incase a baby hit their head on that edge, and I wanted the top to look more cubed and straight with the base (once it had batting and fabric add to the thickness) rather than taper.
I used spray adhesive to keep the foam pieces in place
These are the metal pieces I got from Home Depot to screw onto the base for the feet to screw into.
I also needed this button kit to create fabric-wrapped buttons for the tufting and long upholstery needles to poke through the holes to pull the buttons tight through the foam!
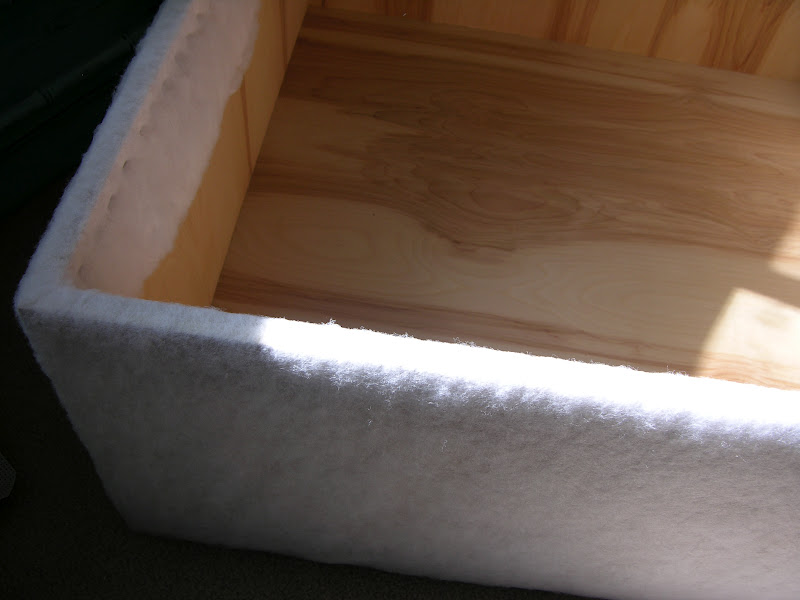
Next step: wrap the lid with batting. I cut two 4'x4' pieces to wrap 2 layers around the foam and staple gun to the bottom of the wood. Then cut excess off.
Now wrap batting around the sides of the base. I cut 4 strips of 2'x6' batting that fit out of my King shape and staple gunned one at a time around the inside and the bottom of the base.
Here it is all covered in batting:
Now comes the fabric- a little trickier since you ca't hide mistakes easily. I cut a 4'x4' piece to wrap tightly around the lid and stapled it; wrapping the corners as nicely as possible.
For the base,
I cut four strips of roughly 1.5' x 3.3' fabric. Then took two pieces and put them inside out (good side facing the inside of the ottoman) and pinned the corner where they met, using a sharpie to draw a pretty straight line as my guide to sew along. I don't have pictures of the sewing part unfortunately. I'd use a ruler to straighten out my line once I got it in front of the machine. Once that corner was sewn (only the 13" in the middle so the top and bottom could freely fold around corners to be stapled) I'd repeat the first step of turning it inside out, putting it on the ottoman for a dry fit, and pinning the next piece to the next corner. sew, repeat, sew, repeat. Once all four are one continuous piece, flip it right side out and slide it snuggly over the base and staple the top and bottom flaps into place.

These are the metal attachments for the feet. I measured 3" from the edges and drew dots where the screws went. I chose 3" because it let me hit wood rather than have to go through fabric and rip it up with a screw.
For the upholstery section:
I used fishing wire because it's obviously stronger than thread and has a bit of give. I tied it around the needle eye, then started on the bottom/inside of the lid. Poke the needle straight through the center hole that's drilled...
Once it pops through the top fabric, thread the button on, and go back through the fabric towards to hole (not so easy sometimes, Matt came to my rescue and helped me get the needle through when I kept hitting the wood.)
Once you have it back through to where you started, pull the button in as tight as you want to give it a tufted look on the front, and staple gun the string in a zig-zag pattern so it won't pull out at all. [I chose this method over tying it around a piece of scrap fabric like the guide said because I wanted it to look a little cleaner on the underside when you opened the lid]
The finished product in it's final home! I am in love with the fabric Melissa chose from Hancock Fabric!
Did you notice the feet are gone in the final photos. It was supposed to be raised off the ground a bit, but when we got it there- somehow a cut or measurement was wrong because the ottoman was way too tall for their couch. The solution was to unscrew the feet. :( kinda sad, but Matt said the good thing is they don't have to worry about toys rolling under there and getting forgotten and dust-covered!
I think the sides ended up being cut at 13" tall because there was less scrap wood, but they were meant to be cut at 11" so I guess 2" can make a big difference!